Thursday, March 3, 2011

Banana Foster Cupcakes.....go bananas!

I created this recipe when I wanted to celebrate a friend’s birthday;  incorporating her favorite dessert, Banana Foster,! The results were terrific. This recipe was made so that the cupcakes were fluffy and yet  full of real banana flavor (you better like bananas if you are going to try this one!). The frosting was designed to be quick, simple, and rich in flavor. Carmel, a necessary ingredient in Banana Foster, is also incorporated in the center of each cupcake for a tasty surprise. Lastly, these sweet and delectable cupcakes are topped with sautéed bananas!

 Banana Foster Cupcakes

Author: Brenna Bowers
Makes: 24 cupcakes

Banana Foster Cupcake


Mashed bananas- with a fork

Dry and Wet ingredients- stirred separately and then combine and beaten well.

Banana Foster Cupcake batter

I use my favorite cookie scoop to fill the cupcake holders,  only fill muffin cups 3/4 full


*Notice the recipe calls for 1/4 cup of flour in the cupcake batter- the purpose of this is so that the cupcakes turn out "dome shaped" not "flat topped"


Caramel Cream frosting ingredients

Carmel Cream Frosting- notice it is smooth and thick

Slice bananas 1/4 inch thick- only when ready to use...don't want them to brown

Sauteed banana ingredients warming up in the pan

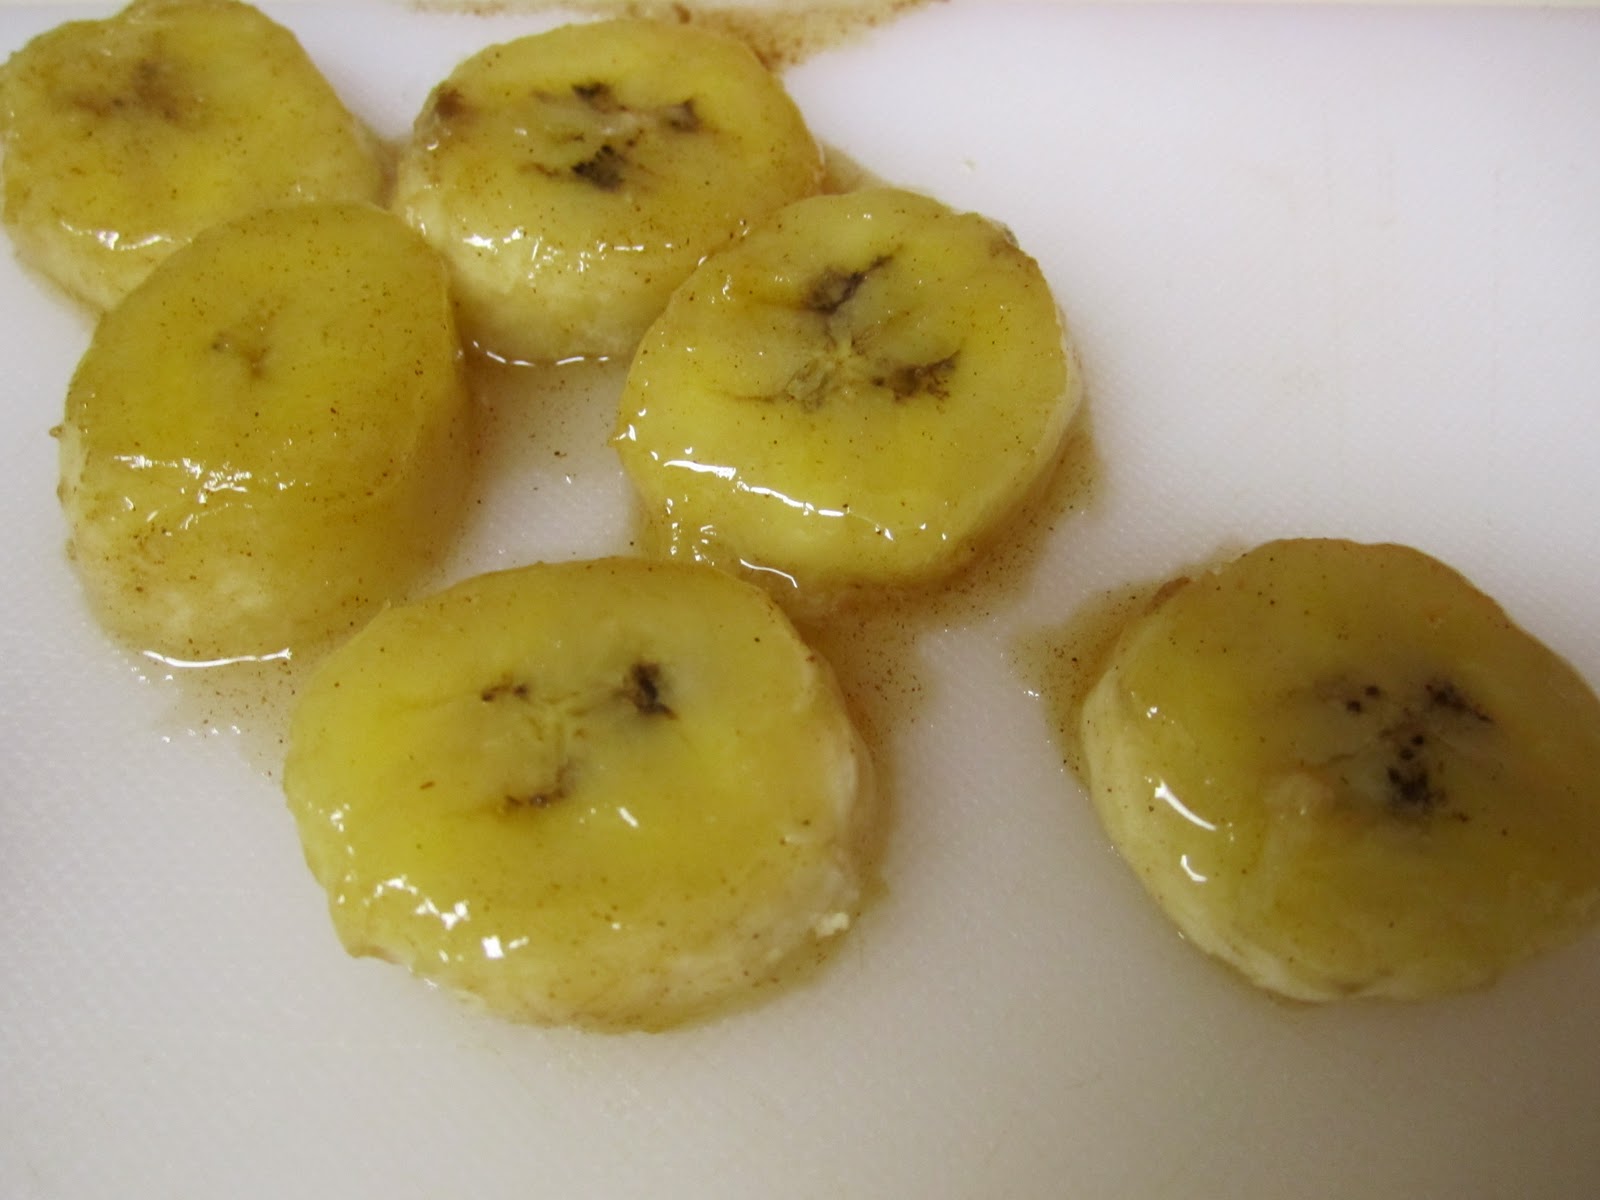
Saute the bananas low and slow! (one minute per side)

Lightly cooked bananas, remove with slotted spatula and chill.

Sauteed bananas

Remove a small hole in the center, top of each cupcake with a paring knife.

Fill the cupcake hole with caramel sauce.

This will be a nice surprise to bite into!

Frost with a piping bag  using #12 Wilton tip, top with a sauteed banana and pearl sprinkles.


Banana Foster Cupcakes
Author: Brenna
Makes: 24 cupcakes

3 ripe bananas, mashed (want many brown speckles but not a fully brown banana)
3/4 cup water                                                                                    
1/4 cup oil
3 whole eggs
1 tsp vanilla
¼ tsp maple flavoring
1 box white cake mix
¼ cup flour (tip 1)
3/4 tsp baking soda
1 tsp baking powder
1 tsp cinnamon

Sautéed Bananas:
2 firm bananas
1 Tbs butter
3 Tbs brown sugar
1 Tbs water
¼ tsp cinnamon
Dash salt

Caramel Cream Frosting:
½ stick butter, room temperature
½ cup powdered sugar
1 (16 oz) jar premade vanilla frosting
1 (16 oz) jar premade cream cheese frosting
3 Tbs caramel syrup (found at Trader Joes or Vons) (extra needed to fill the cupcakes later)
1 Tbs Rum (optional)

Extras:
“Better Crocker Pearl Cupcake Gems” (optional) (these are sprinkles)

Directions:
Cake:
In a small bowl, mash the bananas with a fork. Add all the wet ingredients to the mashed bananas and beat well (about 1 minute). In another large bowl, mix all the dry ingredients. Add the wet ingredients into the dry ingredients and beat until the batter is smooth (about 2 minutes).
Place cupcake liners into a cupcake pan (this recipe makes 24 cupcakes). With a large cookie scoop or oversized spoon (I prefer the stainless steel cookie scoop #16, fill only ¾ full) fill the cupcake liners ¾ full so that the cupcakes do not overflow!

Bake at 350 F degrees for 13 minutes- better to pull them out when the top crack is still moist so they do not over bake.

*Pressed for time? Then make the cupcakes a day ahead of time, just cover with saran wrap (when the cupcakes have cooled) and place on the counter overnight.

Sautéed Bananas*:
Must be made the day of so they do not turn brown- even best if made a few hours before!
Turn on a large sauce pan to medium-low heat. Add in the butter and let it melt. Once melted, add in the brown sugar, water, cinnamon, and salt. Slice up the firm banana into ¼” slices (do this step right when you are ready to put the bananas in the pan to keep them from turning brown). When you see small bubbles forming in the brown sugar-butter mixture, add in the slices of banana placing one layer in the pan. Make sure all the bananas are in the mixture! Cook for 1 minute on one side and flip them all over and cook for another minute on the alternate side (remember we want low heat..you want the banana to just take in the flavor not to turn mushy). Remove the banana slices from the pan with a slotted spatula and place onto a plate. Cover right away with plastic wrap (while it is still warm) and place into the fridge to chill. The bananas must be cool when you place them on the cupcakes!

*alternate option to sauteed bananas: place on top of each cupcake a banana chip or freeze dried bananas

Caramel Cream Frosting:
In a large bowl, add the room temperature butter (not melted and not cold!!!!) and the ½ cup powdered sugar. Beat with your electric mixer for about 1 minute- you want the mixture to become creamy. Add in both the premade frostings, caramel sauce, and Rum (add more caramel or Rum if you like…but don’t overdo it because you then will need more powdered sugar if it is too runny). Beat until the frosting is smooth and even in texture and color.

Assembly:
Must happen the day of! You do not want to place the sautéed bananas on any sooner than needed (right before service is best).
1. Remove a small hole out of the top of each cupcake using a paring knife. Fill the holes of each cupcake with the left over caramel sauce.
2. Place frosting into a piping bag with a #12 Wilton Tip. Pipe the frosting in a circular motion onto each cupcake starting from the outside in a circle and moving inward.
3. Remove the bananas from the fridge once they are cooled and lightly press each banana between paper towels- this will remove express liquid. Place onto the cupcake.
4. Sprinkle a couple “Better Crocker Pearl Cupcake Gems” (found at Vons/Safeway)
5. Let the frosting harden (about 20 minutes) and then place the cupcakes on a tray and cover with saran wrap. Place in the fridge until service time.

Tip 1: I have added some extra flour in the recipe because the first time I baked these, my cupcakes did not have a nice “dome shape” like I prefer but rather my cupcakes baked with a flat top”. So this recipe has been adjusted to make the cupcakes have a nice round shape and bake properly if you add the ¼ cup flour!


Monday, February 28, 2011

What do you get when you cross Peanut Butter with Breakfast?

Today as I was browsing my favorite website, Tastespotting - a site that is every foodies dream! It is filled with will photographed pictures of food and links you straight to the blog for the recipe...what more could you want?

While scrolling through the pictures, I ran across a picture of a new phenomenon....Peanut Butter Pancakes! I have not had then chance to test this recipe myself but I wanted to share it with my peanut butter loving friends.


Peanut Butter Pancakes
from the blog of This Homemade Life: http://thishomemadelife.com/?p=335

Ingredients:
1 1/4 cup flour
2 Tablespoon granulated sugar
1 Tablespoon baking powder
1/2 teaspoon salt
1 1/4 cup milk, dairy or non-dairy
1/4 cup peanut butter


Directions:
In a medium bowl, combine the flour, sugar, baking powder and salt.
In small bowl or measuring cup, stir together the milk and peanut butter til smooth.  Add to the dry ingredients and beat just until a batter is formed.  Do not over beat.
Lightly oil a nonstick saute pan or griddle over medium heat.  Spoon the batter by 1/4 cupfuls inot the pan.  Cook until golden brown on both sides.  Serve immediately.
*I did not oil or use butter for my griddle, it’s non-stick and worked fine without it.*


For those of you who test this recipe, be sure to let me know how they turn out and where adjustments can be made!

Sunday, February 20, 2011

Eggplant Parm Stacks de Italia and Brenna....

Looking for a healthy weeknight dish that can be reheated and taste just as good the second and third night? This recipe that I created, tested, and loved is the perfect thing for you! I learned this unique way of making Eggplant Parmesan when I was in culinary school in Florence, Italy. This dish is absolutely tasty just out of the hot oven or sometimes I like to cut it into chunks once it has been chilled and toss it into a green salad. Now the possibilities are yours!


Eggplant Parmesan gone stack-able
Slice the eggplant in 1/2" rounds, place on paper towel, sprinkle with salt.
The salt draws out the water content to brown it better when it's pan fried.
Season the breadcrumb mixture which will coat the eggplant.
Dip the eggplant rounds into the egg wash.

Next dredge the eggplant into the seasoned breadcrumbs.


Place the breaded eggplant in a hot pan with olive oil to brown it.

Brown both sides of the eggplant.

Place the browned eggplant in a baking dish with tomato sauce.

Sprinkle with Mozzarella and Parmesan cheese.

Spoon on a dollop of tomato sauce.

Repeat the process and stack!

Stacked eggplant layered with tomato sauce and cheese x2

Ready to be baked.
Ready to eat after being baked and letting all the flavors come together!


Eggplant Parm Stacks (Brenna)
A healthy weeknight dish that can be reheated and taste just as good the second and third night
Author: Brenna Bowers
Makes: 6 servings in a 13x9” baking dish

Ingredients:
1 large Eggplant, but into ½” rounds
1 tsp rock salt*
1 egg
1 Tbs. water
½ cup bread crumbs
½ cup whole wheat flour
1/8 tsp salt, pepper
¼ tsp garlic powder
3-4 leaves of fresh basil, ripped into small pieces (or ½ tsp dried Italian seasonings)
3 Tbs olive oil
2 cups mozzarella/Parmesan (use a mixture of both or just one if you like)
1 jar pasta sauce (the better kind you buy the better this dish will taste)


Directions:
Line your counter with 2-3 paper towels. Slice the eggplant into ½” round circles and place them on the paper towels. Sprinkle the rock salt on each slice and let rest for about 15 minutes (Tip 1). After 15 minutes, wipe off the water droplets that have formed along with the excess salt, using a paper towel. Repeat this process for the other side of the eggplant (using new dry paper towels). Set you prepared eggplant aside as you prepare the rest of your ingredients.

In a small bowl, whisk the egg and 1 Tbs. of water.
In a medium bowl, mix your bread crumbs, whole wheat flour, salt, pepper, garlic powder, and torn fresh basil (into small pieces, can also be chopped very finely if you prefer).

Get out a large skillet/pan. Place it at medium-high and add the 3 Tbs olive oil (Tip 2).

Preparing the eggplant:
Now you will make an assembly line with all your prepared ingredients to “dredge the eggplant” (a process of dipping an ingredient into flour to help it brown). First, with your hands, dip your eggplant into the whisked egg/water mixture until completely submerged. Shake off the excess egg and place right into the breadcrumb mixture (this is to help you flour mixture stick). Pat the breadcrumb mixture onto the eggplant well so that it is completely coated. Place it right into the hot pan with the oil. Continue this process until the pan is full with the “dredged eggplant”. Brown all the eggplant rounds, about 2-3 minutes per side. Set on a plate lined with paper towels to soak up the extra oil and repeat this process with the next set of eggplant rounds.

Assembly:
Place a few spoonfuls of tomato sauce on the bottom of a 13x9” baking dish (Tip 3). Place one layer of the eggplant into the baking dish. Next, sprinkle on a generous layer of cheese then a spoonful of sauce. Repeat this process with another layer of eggplant and other ingredients making sure this time to end with the cheese (for the cheese will crisp up in the oven and give a nice color and flavor).

Baking**:
Place in a 350 degree F oven for 30 minutes, or until the cheese has turned golden brown and the contents of the dish are bubbling. Serve hot and refrigerate the extras- this dish is good for quite a few days and the flavors continue to get better each day!


*The use of rock salt is so that saltiness does not seep into the eggplant but rather soaks up the water. Kosher salt is second best, but use less so that you don’t get a dish that is over salty. Use about half the amount if you are using table salt.

**This dish can also be made ahead of time by baking it half way, freezing it, and then baking when you are ready to enjoy it from its frozen state in a 350 degree oven for about 20 minutes, or until bubbling.


Tip 1: This step must not be skipped, the purpose is to draw out the water in the eggplant so that it browns nicely when pan fried.

Tip 2: You want your oil somewhat hot before you place the eggplant in it- but not smoking. When oil reaches its “smoke point” this is when it is unhealthy possibly causing carcinogens.

Tip 3: Placing tomato sauce on the bottom of the baking dish keeps the eggplant from sticking and makes it healthier than greasing the dish with oil. This same idea can be done for homemade lasagna as well.


Wednesday, January 19, 2011

Slated Caramel Cupcakes with Caramel Frosting.....sweet yet salty and utterly delicious!

This recipe was created for Ryan and Kristen Smith. I enjoyed making these Salted Caramel Cupcakes for their wedding and will make them many more times to come as I am such a fan of their sweet yet salty flavor....it's a wonderful combo!


Remove some of the cake and fill with Caramel sauce

Cupcakes filled with caramel sauce


Salted Caramel Cupcakes
Author: Brenna Bowers
Makes: 24 cupcakes or 2 layer 8” cake

Ingredients:
1 box Duncan Heinz White Cake Mix  (or Pillsbury)
1 box instant butterscotch pudding mix
4 egg whites
2 Tbs oil
1 1/3 cup water

1 jar Mrs. Richardson Caramel Sauce (found at Safeway/Vons) (Hershey’s Carmel syrup is 2nd best in my oppinion)

Directions:
Mix all the ingredients well! Place in cupcake holders or greased cake pan. Bake at 350 degrees F until done (ready when the toothpick comes out clean). (Cupcakes take about 13 minutes).

Let the cupcakes cool completely! With a paring knife remove a piece of the cupcake in the center of the top about as big as your pinky finger (not big at all!).

Fill a baggie or squirt bottle with the Carmel sauce (cut the tip if needed) and pipe into the whole of each cupcake.

Prepare frosting (see below) and pipe/frost over the caramel filled whole. 


Caramel Frosting
(Frost cupcakes with this frosting then top with Caramel sauce and flake salt)
Author: Brenna Bowers
Makes: enough frosting to cover a 9” cake

 
Ingredients:
3 sticks butter
¾ lb powdered sugar
½ tsp vanilla
8 oz Mrs. Richardson Caramel Sauce (found at Safeway/Vons) (Hershey’s Carmel syrup is 2nd best in my oppinion)
2 Tbs milk

Flake salt- found at specialty markets

Directions:
Beat the butter and powdered sugar very well with a mixer- about 2 minutes. Add the other 3 ingredients and whip until well incorporated.
Pipe/Frost completely cooled cakes/cupcakes.


To Assemble Cupcakes: After having filled each cupcake with caramel sauce and once you have frosted each cupcake, drizzle more caramel sauce on top of each cupcake and sprinkle with a light dusting of the flake salt. Enjoy!!!!


Chai Cake....believe it you can enjoy your favorite tea in cake!

I had the privileged of making the wedding cake for Ryan and Kristen Smith! They are 2 foodies and were looking for a cake to suit their craving for something unique yet tasty....therefore I created this recipe and have dedicated it two the two of them!


Chai cake batter


Chai Cake
Author: Brenna Bowers
Makes: 24 cupcakes or 2 layer 8” cake

 
Ingredients:
1 White Cake Mix (Duncan Heinz or Pillsbury)
1 tsp vanilla extract
1/2 tsp almond extract
1/4 tsp maple flavoring
¾ tsp of the contents of a Chai tea bag (Bigelow)
Dash nutmeg
½  tsp + dash of cinnamon
3 egg whites
1 1/3 cup water

Directions:
Mix all the ingredients well! Place in cupcake holders or greased cake pan. Bake at 350 degrees F until done (ready when the toothpick comes out clean). (Cupcakes take about 13 minutes).

Monday, January 17, 2011

Caramel Corn....you can't just have one bite!


The perfect recipe to satisfy a craving of something crunchy, sweet yet salty, and soooo delicious!


Begin with 2 large pans and lots of popped corn!

For best results use a candy thermometer to cook the caramel properly

The caramel mixture has now been brought to 225 degrees F.

The caramel mixture with the addition of vanilla, maple, and baking soda.

Pouring the caramel goodness to coat every kernel of popcorn.

Mix well so that the caramel mixture is evenly distributed to all the popcorn.

Bake it and stir every 15 minutes until golden brown and crunchy!

The perfect batch of caramel corn!

Carmel Corn
Author: Brenna Bowers
Makes: 35 cups (2 large oven pans) (enough for all your friends!)

Ingredients:
1 ½ cups white corn kernels (35 cups when it is popped)
2 cups brown sugar
1 cup butter (2 sticks)
½ cup dark corn syrup (or maple syrup) *
1 tsp salt
1 tsp vanilla extract
1/2 tsp maple flavoring
1 tsp baking soda
Optional 3-4 cups nuts (walnuts, pecans, or almonds: raw is best but pre roasted is fine too)

2 oven pans (the biggest pans you can find with a 3-5" lip to 
    hold all the popcorn inside)

Directions:
Pop the pop corn kernels (how-to below). Remove all the un-popped kernels and discard them. Spray both of the oven pans with cooking spray. Distribute and add the popped corn (and nuts) evenly into 2 large oven pans.

In a medium sized sauce pan over the stove, combine brown sugar, butter, dark corn syrup, and  salt. Cook slowly (so that the sugar dissolves) and then bring to a boil. Once it starts to boil you do not need to stir, just put in a candy thermometer and wait for soft ball stage (225 degrees F), about 5 minutes.

Remove the mixture from the heat and let it cool down a little (about 30 seconds). Add the tsp of vanilla extract and the maple flavoring then stir it in. Then add the tsp of baking soda and stir (it will become white and bubbly again). Immediately pour the caramel  mixture (evenly dividing amongst the 2 oven pans) over the popped corn (and nuts). Stir until the corn is evenly coated. (or try Abby's Tip: try mixing the popped corn and caramel mixture in a large brown paper bag by shaking it until all the corn is coated)

Place the pans into a 250 degrees F oven for one hour, stirring every 15 minutes!
You know the caramel corn is ready when the corn does not stick together when stirred. 

Let the caramel corn cool completely before you bag it or place it in an air tight jar.

*Use light corn syrup if you prefer caramel corn that is not as dark in amber color...will have a different flavor but is just as yummy!

**Freezes well if placed in an air tight container.

How-to pop Popcorn Kernels:

With an air popper : Add 1/2 cup of kernels at a time into the air popper. Plug it in and let the air popper do its job! Continue to repeat this process until all the kernels are popped. 

With a pot over the stove: Place 1 Tbs of vegetable oil in a large pot. Turn on the heat to medium-high. Add 1 cup of the kernels into the pot and place a lid on it. Shake the pot to coat all the kernels with the oil. Leave the pot on the heat until you begin hearing the kernels pop. Pick up the pot and shake it (with the lid on!) and place back on the heat. Continue this process (shaking the kernels to keep them from burning) until there is a 5-7 second delay and therefore no more pops-it is now done. Pour the popped corn into a pan and repeat this process with the next batch of kernels.

Tuesday, January 11, 2011

SunnySideUp Breakfast Egg Burrito....

A fabulous breakfast burrito that is quick, easy, delicious and best of all a balanced meal to start off your great day!


SunnySideUp Breakfast Egg Burrito
Author:  Brenna Bowers
Makes: 1 Burrito

Ingredients:
1 tsp butter
2 Tbs white onion, chopped or sliced
1 small clove garlic, minced
1 small roasted red bell pepper in oil, drained and chopped (found at Trader Joes in a jar) ½ cup ¼ cup fresh spinach, roughly chopped
1 whole wheat tortilla
2 Tbs cheddar cheese, shredded
¼ of an avocado, sliced
1 egg
Salt and pepper

Directions:
Turn on the heat to medium-low and add the butter into a small sauté pan. Once the butter is melted, sauté the onion for about 2-4 minutes, stirring once in a while and continuing to cook until translucent. Add in the garlic, roasted red bell pepper and spinach; sautéing until the spinach wilts down (about 1-2 minutes) and stir every so often.

Sprinkle the cheese onto the tortilla and place it in the microwave for about 40 seconds- just long enough to melt the cheese. Slice the avocado and place it onto the tortilla with the melted cheese. Place the sautéed veggies on the tortilla as well.

In the sauté pan (just used for the veggies), carefully crack the egg into the pan (not breaking the yolk) and sprinkle with salt and pepper to season. Allow the egg to cook low and slow until the egg white turns opaque (when the egg white turns from transparent to solid white and the yolk is still runny, it is ready). Place the SunnySideUp egg on the tortilla and wrap it up like a burrito. 

Eat up and start your day right!